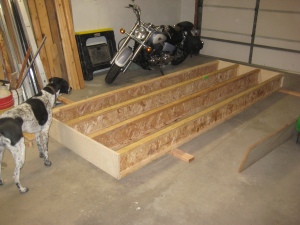
Finished painting the garage, and putting up the shop lights, and well into the construction of the jig table. I decided to go with the jig table designed by Rick Maddy, which uses TJI’s for supporting the table. I also heeded his advice, and am waiting to add the 3/4″ particle board top until after I get it turned right-side-up. I started by laying the I-Joists across a couple 2×4’s in their rough position and spacing. I then cut 2 pieces of 3/4″ plywood 48″ x 9 1/2″ for the end caps. After spacing the joists properly, I shimmed up each of the corners (as necessary) to get the joists level both length ways, and from joist-to-joist width ways. After all was level, I screwed in the end cap plywood, making sure each joist was plumb, using the level, before screwing them in. This gave me the basic box, as shown above, (under the proper supervision of Sally).
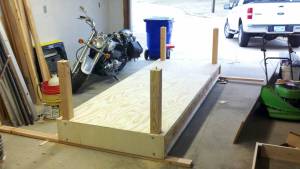
At 6′ 2″, I’m fairly tall, and am looking for a table where I’m not going to have to be bending over excessively. Having had back surgery in the past, having the table at a comfortable height is of significant importance to me. I would like to have the table at at least counter-top height. I am adding the adjustable legs, as shown in Rick Maddy’s design as well, but I used 3 1/2″ bolts for leveling instead. This will give me a bit of extra travel, in case I want the table a bit higher, however, I don’t want to have the bolts extended out of the posts too far, for the structural integrity may not be enough to support the weight. I ended up cutting the 4×4 posts at 34 1/2″, which I estimate should get me about a 36″ to 36 1/2″ table height when finished.
Since I would be using lag bolts to fasten the posts to the side of the joists, I would need to fill in the gap between the I-Joist and the post. This gap measures out to be 1″, so I doubled up some scrap 1/2″ OSB board I had from putting up the wall board in the garage. I found it to be best to use clamps to clamp the post securely to both the joist, and to the end cap plywood before drilling and adding the lag bolts. May be a bit of overkill, but I used 4 bolts on each post.
Next, I added the 1/4″ plywood on the bottom of the table, and secured it with screws about every 2′, for each of the 4 joists. Next is adding the threaded sleeve to each post. After finding the largest sleeves the hardware store sells, matching bolts and nuts (2 per), I drilled the properly sized holes into the ends of the posts, being sure to keep the drill plumb in all directions. (Easier said than done, of course) There is a slit across the top of the sleeve, that fits a very large flat blade screw driver, but I found using that method to install the sleeves to be a bit cumbersome and hard to keep straight. I ended up tapping the sleeves into the holes just enough to get them started, and then I screwed in my bolts. Once the bolt bottoms out on the sleeve, the sleeve starts screwing into the post. Once the sleeve was screwed into the post far enough, I removed the bolt, added the two nuts used to lock the height, and then screwed it back in as far as it would go again.
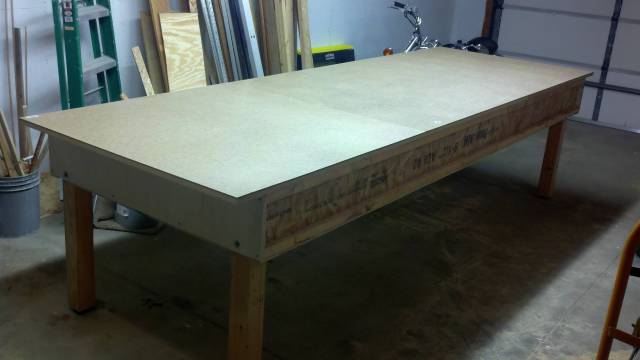
Kim and I decided to try to turn the table over, to see how hard it would be. As it turns out, it wasn’t bad at all to turn over without the particle board attached. Thanks to Rick Maddy for that hint. I screwed the particle board onto the I-joists. Particle board is pretty dense, so I opted to predrill all my screws and counter-sunk the holes so none of the screws would stand proud of the particle board surface. Spaced the screws about every 2 feet. Then added the hard board top, and fastened with brads. I will probably add a shelf underneath at some point, but as for now, the jig table is el completo…


.jpg)