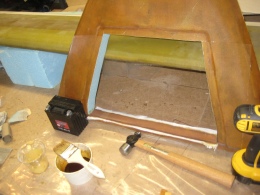
I have been working on the project, but I have been bad at updating my logbook lately. Time listed is conservative, when you take into account there has been a lot of time spent figuring out the electrical wiring of the electric nose lift. I tried fitting the lift in the opening and connecting to the strut. I was not able to get the end of the actuator lined in NG4A so the bolt would go through. Turns out NG3A and NG4A were not parallel with the strut. At the time, I thought the strut was too thick. I had sanded through the torsional layers, but that ended up being a mistake. So after removing the NG3A and NG4A again, I added the torsional layers again and floxed NG3A and NG4A again. I added the torsional layers again and floxed NG3A and NG4A again. Tested fit again, and this time the end of the actuator wouldn’t quite fit into NG4A, but I devised a way to spread it apart a little so it would fit. I found a bolt that barely fit into the opening, then I removed it and added a nut on the end. Then I fit it in the opening and started removing the nut, which ended up spreading apart the ends. This worked perfect, and the actuator  fit. Than I added some layups on the sides to strengthen the NG3A and keep it from breaking loose and sliding down the strut on a hard landing. I essentially used 2 strips folded back onto themselves to make 4 layers. I also used a flox roll between the layers, up at the edge of NG3A, to make it a bit thicker there and block it from sliding. Peel ply’d and let cure.
Fit the nose strut back into the fuselage and fit the electric nose lift with brackets into the nose assembly. Connected with one bolt (per the instructions), marked the holes to drill on the brackets, drilled the holes on the drill press, and reassembled. Tested with a battery. Works as advertised!
Carved the nose foam per instructions. During the assembly of the nose bottom, I did not have the glass trimmed properly, figuring the excess would be hidden, but that bit me in the butt when sanding the curvature. Sanding foam with glass in the 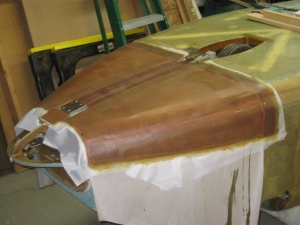 way, makes carving very difficult. I cut out some of the micro and glass that was in the way. Unfortunately sanding got a little too deep behind F0 on the pilot’s side, so I will have some finish work to do there. Not too bad, but enough for me to notice.
Glassed the fuselage nose bottom, 2 plies BID, with an extra layer over the nose strut. Finished with Peel Ply.
 Cut open the opening to release the nose strut cover from the fuselage bottom. Ended up cutting too deep and cutting a slit through the torsional wrap by accident.
After consulting the Cozy list to see if I was going to have to remove the cover to fix, I found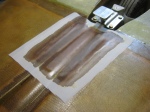 out that I would. Turned out to not be a big deal. The slit was 3.5″ in length, so I only needed to remove 5″ of the cover. Added some flox into the slit and covered with 2 ply BID. Let cure fora few hours, and then positioned the gear into the fuselage, and added the additional 3 plies to replace the part I removed. Finished with peel ply, and back to forward progress.
Glassed the back side of the gear door with glass overlapping onto the front strut. I used flox in the corner toward the bottom for a better hold, then used micro in the corners up the rest of the way. Thinking this will help hold better, should there be a hard landing on the front strut. Finished with peel ply.
 After talking with Dennis Oelmann yesterday, he gave me a few pointers on carving the top of the fuselage nose. In using the template for carving the nose, it sounds like the carving template may have originally been for the narrower F28. If you use the thicker F28 and use the template (presumably for the thinner F28), you end up with what looks to be a kink in the nose. Regardless of the reason, I have seen where builders have had that issue, so I was listening… Dennis recommended first installing the canard. Then use a long flexible ruler (or something similar) and lay it from F28 to F0. It will have to bend over the foam to get the proper curvature, and then I removed foam until there was a nice fit. The most important part is to be sure that when the ruler is laid across the curvature, that there is a distance of 3/4″ to 1″ gap between the ruler
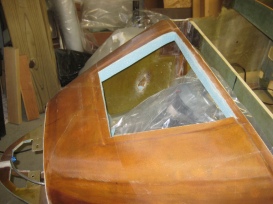
  and the canard. This extra thickness at that location should solve the issue with the kink in the nose. I guess time will tell! Then I started with the nose door. I cut the 3 layers of BID out per plans, trimmed to proper dimensions, and transferred to the nose which I already had box sealing tape applied for release. Added peel ply and wait for cure.
Trimmed the edges of the nose door and added 3 layers around the outside edge on the bottom side, 1″ thick. Placed back on the nose and weighted in place to keep the proper form.
Marked the nose door on the nose after trimming the edges of the door. Sanded down the foam for the door to fit into. Wasn’t enough time to start glassing though.
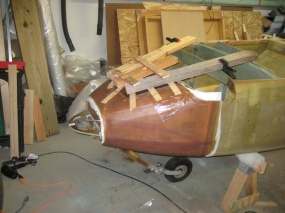
Micro’d the foam and added 2 plies of BID at 45 degrees. The BID wasn’t quite wide enough for the whole nose section, so I had to have a small section of overlap. Finished with peel ply and covered the nose door area with saran wrap and put the door in place. Weighted the door in place with a wood contraption that I created that placed pressure along the edges.
Started by cutting out the nose door, and then cut the top off that I just finished glassing two nights before. Then I floxed the corner of the aft edge of the opening, and added 2 plies BID. Finished with peel ply.




.jpg)